
- Read our review guidelines
Ready to hit the water and take your kayaking adventures to new heights far from home? You’re probably going to need to use a roof rack on your car (although it is possible without a rack altogether!).
Kayaking might come easy to you but fixing a roof rack to your car might a completely different story.
With our expert guide, installing a roof rack for your kayak has never been easier.
Let’s start off with rack types…

Racks Used To Transport A Kayak
Crossbars
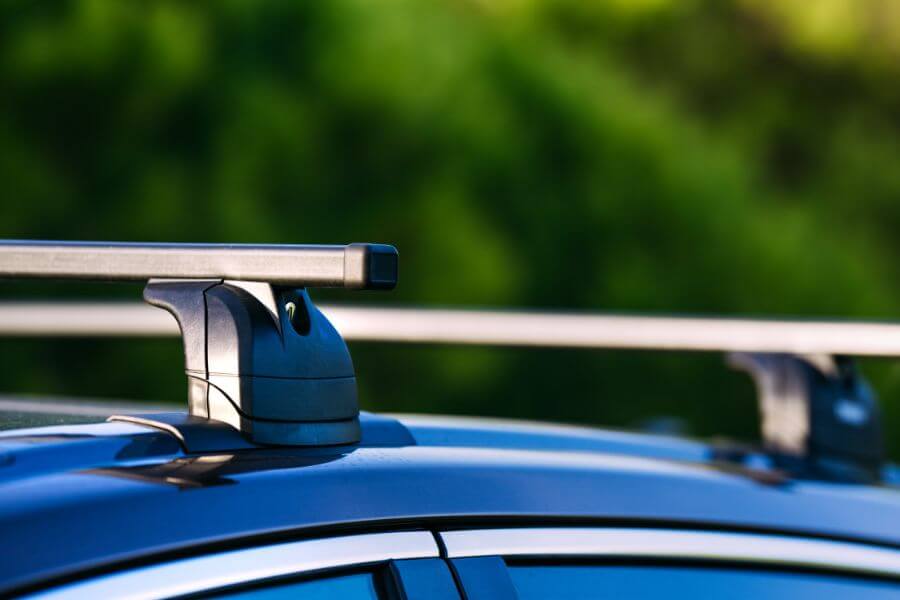
Crossbars can be the ideal solution to carrying cargo on the roof of your car. Crossbars are also usually required as a base before mounting any other type of rack or kayak carrier to your roof.
Crossbars are fitted across the roof of your vehicle, with one crossbar positioned closer to the front and the other positioned closer to the back.
Kayaks can be transported directly on the crossbars. But you may want to add some padding to protect the hull of your kayak from dents and scratches.
Once you have crossbars installed on your roof, you can usually mount most types of kayak racks. You can also install other types of racks for outdoor gear, such as bike racks, or you can haul other cargo.
J-Racks
J-racks are probably the most popular method of transporting a kayak on your car. J-racks are specifically designed to carry kayaks safely on their sides, with the rack offering J-shaped arms that cradle the hull of the kayak.
They also allow you to potentially carry more than one kayak (with another set of J-racks) or other outdoor gear on the other side of your roof.
J-racks often have padding and consist of a pair of J-cradles. One J-cradle attaches to the front crossbar on your roof and the other attaches to the rear crossbar.
Stacker Racks

Stacker racks are usually sold in pairs and feature an upright arm that kayaks can rest against. The stacker rack is fixed to the crossbars on your roof, with one arm on the forward crossbar and one on the back.
Because of the upright arms of this rack, you can carry multiple kayaks using just one stacker rack. Depending on the width of your roof and crossbars, and the size of your kayaks, you could potentially carry up to four kayaks (two on either side of the arms).
Stacker racks let you carry your kayaks on their sides. You may still need padding under the hull, as the kayaks sit directly on your crossbars with this type of roof rack.
Saddle Racks
Kayak saddle racks are designed to fit onto your crossbars. Saddle racks often consist of four cradles. Two are fixed to the front crossbar and two to the back. They work like little hands cradling the sides of your kayak as it sits upright on your roof.
In some cases, there are saddle racks that consist of just two cradles. These saddle racks are wider so that they can support the width of the hull with just one cradle on each crossbar, rather than two.
Foam blocks that sit on or over your crossbars could also be categorized as saddle racks, as these perform in a similar way.
Is Your Car Suitable For Carrying Kayaks Using A Rack? Should You Use A Trailer Instead?
Car Roof Design

To carry a kayak on the roof of your car, you will generally need to install crossbars first. But the type of crossbars you need will depend on the type and size of your car, as well as the design of your roof.
Roof designs vary between brands and models of vehicles. This means that not all roof racks will be suitable for all types of vehicles.
Some vehicles have roof rails, either raised or flush rails. Roof rails are often found on SUVs but can also be found on other types of vehicles. These rails run along the sides of your roof from front to back.
A roof rack can easily be installed on roof rails, as the rails act as the mounting points for the crossbars.
Cars that don’t have any rails will often have mounting points or fixed points to install a roof rack. Failing that, you can still install a roof rack by mounting the crossbars to the door jambs on your car.
If you have a soft-top vehicle, such as a soft-top Jeep Wrangler, you may need another solution that can be mounted over the top of your roof.
You should also take into account the width of your vehicle’s roof to make sure the crossbars you choose are a suitable size. As you’re probably aware, not all vehicles are the same width.
Is A Trailer More Suitable?
While a roof rack can be one of the simplest ways to transport a kayak, it may not be the most suitable for you and your vehicle.
For example, if you have a very tall vehicle, such as a minivan or large SUV, a trailer might be more convenient when it comes to loading and unloading your kayak.
Opting for a trailer means you don’t have to lift a kayak over your head. This can be particularly helpful if you have a heavy fishing kayak, for example.
However, if loading the kayak on a vehicle’s roof is a struggle because of the weight of the kayak or height of the roof, you can always use a load-assist tool to help you.
With a trailer, you should remember that you may need to consider additional laws for towing a trailer, which can vary by state. You’ll also need to make sure you have working taillights on your trailer and a licence plate (with light).
How To Install A J-Rack Solution On Your Car
J-racks tend to be the most common way to transport a kayak on your car. There are other types of kayak racks, such as stacker racks and kayak saddles. But we’re going to focus on installing J-racks from scratch.
Step 1: Fit Your Bases/Mounts
Once you’ve found the right type of crossbars to suit your roof rails, mount the bases to your raised rails. Most roof racks for raised rails come with clamps that grip the rails.
If you have no rails, mount the bases to either the fixed points on your roof or the door jambs, according to your product’s instructions and your type of roof. Most roof racks for bare roofs will generally come with clips.
The position of the bases will vary depending on your particular vehicle.
It’s best to check the manufacturer’s instructions as this should give you the front clearance and the crossbar spread (the distance between the front and rear bars) required by your particular rack.
It can be a good idea to measure the distance between the bases and bars on either side of your car to make sure the bars will be straight when mounted.
Step 2: Make Sure The Bases Are Secure
Before you add your crossbars, make sure the bases and clips are secure on all four mounting points. This is for safety, so that you can be sure the bases are secure before you attach your crossbars and carry any cargo or mount additional racks.
Step 3: Fit Your Crossbars

With your bases in place on the roof, you can now go ahead and attach the crossbars to the bases. You should always consult the manufacturer’s instructions for how to correctly install your particular roof rack.
Some crossbars will slot into the bases so you can then tighten the fitting for a secure attachment.
However, there are some roof racks that already have the crossbars fixed to the bases and some that require you to mount the crossbars to the bases before fixing them to your car.
So you may not need to attach the bars to the mounts separately. Instead, you can just line up each crossbar to the fixing points on your roof and secure each side when both are in the correct position.
Video: Rhino-Rack – How to fit Factory Rail Roof Rack Systems
Step 4: Install The J-Rack
Grab your J-rack and make sure you have all the mounting hardware that should be included with your particular rack.
Attach the first J-cradle to a crossbar. This probably goes without saying, but the shortest section of the “J” should be closest to you when on the crossbar.
When the J-cradle is in the correct position on your crossbar, according to the manufacturer’s instructions, secure the clamp fitting around the crossbar.
If the clamp has two bolts to secure, then keep the first one a little loose until you do the second one. You can then tighten them both once you know the cradle is straight and correctly mounted on the bar.
Line up the second J-cradle so that it’s positioned at the same distance on the crossbar as the one you’ve already attached. Secure this J-cradle as you did with the first one.
Step 5: Make Sure The J-Rack Is Secure
Wiggle the J-cradles to see if there is any movement on the bars. If the cradles wobble, you should tighten the bolts that connect the cradles to the crossbars, as this means the bolts are not secured properly.
There should not be any movement of the cradles when you try to move them.
Video: How to Install J Racks for Kayaks
Ok, So What Is The Best Way To Hold The Kayaks Down On The Rack?
The best and probably the easiest way to tie your kayak down on your rack is by using tie-down straps with cam buckles. You should also use bow and stern straps to fully secure the kayak and prevent it from flying off if you brake suddenly or if the wind catches it.
You should use two cam straps to secure each kayak to your rack and an additional two straps per kayak to secure the kayak to the front and back of your vehicle.
Once your kayak is in place on your J-racks, loop your cam strap around the base of your crossbar and pass both ends of the straps over your kayak to the other side and under the crossbar. Loop the straps through the J-rack before you tighten them.
A bow line should be secured to a point on the front of your kayak, such as a carry handle, and looped through the tow hook at the front of your car. The stern line should be attached to a point on the back of your kayak and secured to the hitch on the back of your vehicle.
We have a step-by-step guide on how to tie-down a kayak.
Remember, straps can loosen in the wind and if you’re driving long distances. So you should stop periodically to check the straps are still secure and tighten them if necessary, particularly if you’re driving at high speeds.
Final Thoughts
Installing a kayak roof rack on your car is not always the easiest thing to do. But hopefully you’ve found our guide informative enough to have a go and do it yourself.
Remember to check the manufacturer’s instructions throughout the installation process, as not all roof racks are the same.
And, as we’ve discussed, not all car roofs are the same.
Let us know your thoughts and if you think this could help anyone else, share it.